Controlling Tiled2Unity Scale
14 June 2014
Hi there! Tiled2Unity is no longer in development nor supported. Use SuperTiled2Unity to import Tiled Map Editor maps into your Unity projects instead.
Update: Most Tiled2Unity users will want to use the newer vertex scaling feature to scale their Tiled maps.

A couple of weeks ago I released my free Tiled2Unity Utility, allowing developers to export their old-school and tile-based environments (built with Tiled Map Editor) into Unity with (one hopes) relative ease.
You can download the Win32 installer or zip file for Tiled2Unity from the Download Page.
Some of you requested a feature to control the scale of the prefab objects exported by Tiled2Unity, especially give that sprites in Unity2D projects default to a completely weirdo coordinate system where 1 pixel is equivalent to 0.01 units in Unity.
A short note on this: Unity uses Box2D behind the scenes for the physics engine. Box2D is great but it isn’t well suited for pixel-perfect retro game development in my opinion. Our retro games want to work with pixel units where our characters are some 24 or 48 units high and moves some 100 or 200 pixels a second. Box2D wants to work with real-world units where a given character is 1 or 2 meters high and is moved my Newton forces. I feel getting NES-era 2D platforming out of a modern day physics engine is not worth the headache but your mileage may vary.
But I digress. The point being, an important goal for Tiled2Unity is that your generated prefab, once exported from Tiled, is ready to go into your scene without further edits.
So for people that wish to use Tiled2Unity on projects with sub-pixel coordinate systems here’s how you can easily set up your Tiled maps to scale appropriately. Note: This will require you install the newer version of Tiled2Unity (0.9.1.0).
So You Want to Use Physics2D
Let’s say we’ve got the first lady of video games, Samus Aran, in your Unity project and you’ve imported the sprite with the default Pixels To Units setting of 100.
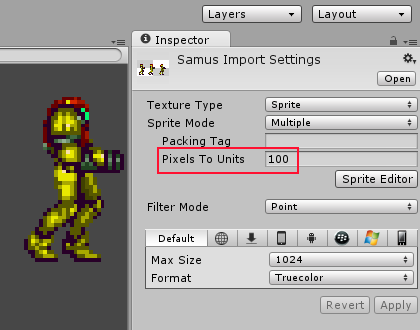
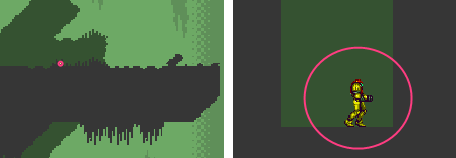
With this, we have a sprite image that is 26x43 pixels but has dimensions of 0.26x0.43 units in your Unity project. Using the minimalist-collision.txm Tiled map from the Tiled2Unity example as-is we’d end up with an exported background that is 100 times too large for our sprite to inhabit. Here she is between two blades of pixel grass …
Setting the Scale in the Tiled File
We could just scale down the prefab we created by hand in the Inspector within Unity but I don’t want to do that every time we export the Tiled map. Instead, we’ll set a property within the map once …
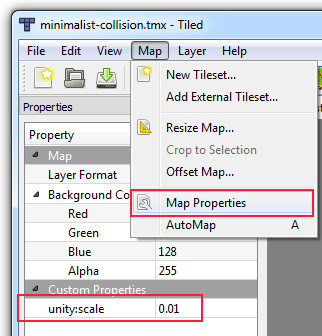
unity:scale 0.01
Now when we export the Tiled map, our Tiled2Unity Utility looks for that unity:scale property on the map data (Tiled2Unity will complain if you try to scale layers or objects, btw) and the automatically created prefab will have the appropriate scale value assigned to it.
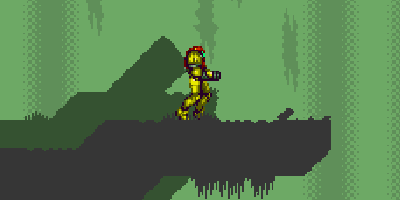
Once re-exported, here’s the final scene with Samus resting on collision geometry with sprite and background using coordinate system values of the same magnitude.
BTW, there are other properties you set in your Tiled map file that control the way your prefab is constructed.
unity:sortingLayerNameunity:sortingOrderunity:layerunity:tag
I’ll cover these soon in another post. In the meantime I’m happy to take suggestions for improvement.
