The Real-Life Adventures of Mega Dad with Tiled2Unity
04 July 2014
Hi there! Tiled2Unity is no longer in development nor supported. Use SuperTiled2Unity to import Tiled Map Editor maps into your Unity projects instead.

I recently introduced my Tiled2Unity Utility where I showed how to get started with Unity2Tiled and walked us through a couple of simple examples.
Now I want to show off some actual gameplay. In these examples we’ll see how a “real” game could interact with our exported Tiled maps. We’ll be introduced to concepts like setting Unity Tags and Layers automatically and reacting to colliders. I’ll show you how I achieve tile map animation and how you can hook into the Tiled2Unity import scripts to add custom behavior to your exported map layers and objects.
I keep these same goals in mind with these examples:
- Exporting should be easy
- Once exported, your prefabs should work without further tweaking – you just place them in the scene and you’re done
A Quick Word on Character Controllers (and Mega Dad)
![]() The focus of these tutorials is Tiled map files in Unity through Tiled2Unity but I did invest some time in a 2D platform character controller using the CharacterController2D provided by prime[31] as a starting point.
The focus of these tutorials is Tiled map files in Unity through Tiled2Unity but I did invest some time in a 2D platform character controller using the CharacterController2D provided by prime[31] as a starting point.
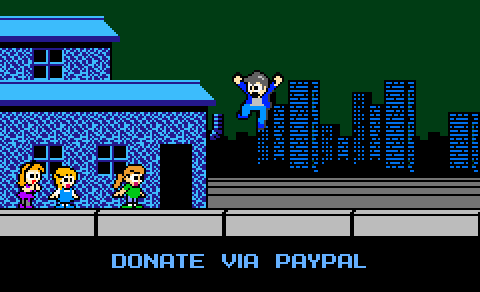
Also, this work is strongly influenced by the Mega Man franchise of the NES golden-age. This will not surprise anyone that knows me. My daughters, being well-aware of my affinity for Mega Man, have taken to calling me Mega Dad at times so my hobbyist programming often includes the sprite I’ve made for the nickname.
Get the Tutorial Files
All the scripting, art, and Tile source files (TMX format) used for these examples is available on GitHub here:
This project contains two sections:
- The Unity project source containing all the functionality and scripting found in this tutorial.
- The Tiled Map Editor TMX source files. These were exported into the Unity project through Tiled2Unity.
Simple Example: No Collision or Gameplay
The simplest use of Tiled2Unity involves a decorative Tiled map in your Unity project. For this, I’m using Magma Man’s lair from Mega Man 9 represented here in Tiled map form …

There’s nothing special about this and no preparation is needed before export. You can find it in the simple-no-collision scene in the example where it just sits there with a camera on it.
Simple Example with Collision
For the Tiled file MagmaManLair-WithCollision.tmx I’ve used the Tile Collision Editor to add collision to all the tiles that I’d expect our playable character to collide with.

Using the Tiled2Unity previewer I can see how the collisions would appear in Unity before I export.

I purposely chose a screen from one of the Mega Man games that had some interesting collision in it to show the kind of complexity that Tiled2Unity can handle. We can see the exported results in the simple-with-collision scene. This scene introduces our Mega Dad sprite as well. You can move him around with the arrow keys and jump with spacebar and see that he’s colliding with the PolygonCollider2D geometry as we’d expect from a Mega Man type game.

Note that all exported layers and objects are, by default, assigned the Default physics layer but we could change that if we wanted to (and will later with more complicated scenes). Since our Mega Dad sprite is set up to collide with Default physics we don’t need to make any changes yet.
Collision with Slopes
The collision geometry from the last example is actually one PolygonCollider2D object but it looks a bit boxy and doesn’t demonstrate the flexibility we have with the shapes of colliders we can use with Tiled2Unity.
There are no examples of sloped collision in the Mega Man NES games so for this example I’m going to borrow art from Capcom’s NES port of Strider — which had plenty of sloped terrain in it.
Here you can see the RedDragon-WithSlopes.tmx file open in Tiled with one of the tiles having a single triangle-polygon on it for collision …

And again, the Tiled2Unity previewer …

This map was exported and added to the slopes scene in the downloadable example. Here you can see Mega Dad standing on the sloped terrain.

Games with such terrain in them usually build their sprites with this in mind so they look better on a slope, but I think you get the idea.
Still, we can make this better through using Tiled2Unity’s ability to set the Sorting Layer on an exported Tiled layer.
Sorting Layer and Order in Layer Properties
As you can see, Mega Dad looks a bit awkward when not on even ground …

Games generally handle this by changing their sprite artwork or by changing their environment to give it more depth or by using the foreground to hide the sprite’s feet.

Taking a cue from Super Metroid, I’m going to put some railing in the foreground over our slopes.

Adding this to our map in Tiled is easy enough but now we’re doing something new with our scene in Unity: We need to render our sprite between two Tiled layers.
By default, Tiled layers are exported with the Default sort layer. Now we’ll want to purposely assign sorting layers. This Unity project has the following sorting layers in order:
- Background
- Default
- Foreground
(Our Mega Dad sprite renders to the Default sort layer in this example)
Each layer or object in Tiled supports custom properties and in order to change our Sorting Layer we add a custom property named unity:sortingLayerName to our layers.
Putting our Background Tiled layer in the Background sorting layer …

And putting our GuardRails Tiled layer in the Foreground sorting layer …

… we construct a prefab on export that hides our Mega Dad’s feet behind the foreground while he’s standing on a slope.

Here’s the list of the properties we can set in Tiled that the Tiled2Unity exporter looks for when constructing a prefab:
unity:tagunity:sortingLayerNameunity:sortingOrder-
unity:layer(Layer is such an overloaded term. In Unity it means the “physics” layer.)
We often don’t want to set unity:sortingOrder as it is implicitly set for you by the order of Tiled layers in your TMX file. We’ll use unity:tag and unity:layer in interesting ways soon.
Note that should you try to use a Sorting Layer Name that does not exist in your Unity project that the importer scripts in Unity will let you know about it through an error in the Unity console:
<span style="color: #ff0000;">Sorting Layer "Foreground" does not exist. Check your Project Settings -> Tags and Layers</span>
Important Update: With Tiled2Unity 1.0.5.0 and later you no longer need to use the unity:layer property. Instead, use the Type field of your rectangles, polygons, and polylines in the Tile Collision Editor. This Type will match the physics layer in your Unity project.
Adding Gameplay with Tags
This next example is probably my favorite as the water scene in the Unity project is a good example of bringing Tiled maps to life in your Unity project.
Getting back into the Mega Man look and feel, the DiveMan-water.tmx Tiled map file borrows from the Dive Man stage of Mega Man 4. You’ll notice the Tiled layers are animating (Update: Animations are supported in Tiled now and later versions of Tiled2Unity will export those animations as-is. There is no longer a need for additional scripting to pull this off.)

This is achieved in Unity scripting by simply selecting game objects based on their tags (AnimLayer1 and AnimLayer2) and toggling between them at a given framerate.
// A cheap an easy class that animates our Tiled layers

class LayerAnimator : MonoBehaviour

{

    public float TimePerLayer = 0.5f;


    private void Start()

    {

        StartCoroutine(AnimateRoutine());

    }


    private IEnumerator AnimateRoutine()

    {

        bool isLayer1Active = true;

        var layer1Objs = GameObject.FindGameObjectsWithTag("AnimLayer1");

        var layer2Objs = GameObject.FindGameObjectsWithTag("AnimLayer2");


        while (true)

        {

            foreach (var obj1 in layer1Objs)

            {

                obj1.SetActive(isLayer1Active);

            }

            foreach (var obj2 in layer2Objs)

            {

                obj2.SetActive(!isLayer1Active);

            }


            isLayer1Active = !isLayer1Active;

            yield return new WaitForSeconds(TimePerLayer);

        }

    }

}
All this script requires is that we have objects in our scene with the appropriate tags. This is where unity:tag comes in.
In Tiled, all we need to do is select the Tiled layers we want to toggle between and give them the AnimLayer1 or AnimLayer2 tag. For instance …

Once exported, our LayerAnimator component in the scene finds the GameObjects on our prefab and animates them.
Adding Gameplay with (Physics) Layers
Also in this example we have gravity changing for Mega Dad when he is inside water. Like the Mega Man games, this will slow his fall and allow him to jump much higher while in water.
This is achieved by having one of the Tiled layers (WaterVolume) being exported with the Water physics layer (again, I apologize for the overuse of the word ‘layer’ — it means different things in Unity and Tiled). We use a unity:layer custom property within Tiled …

Now all the tiles in this Tiled Layer with collision on them will be be gathered into a PolygonCollider2D with the Water physics layer.
Our Character Controller for Mega Dad is set up with a trigger that detects when it is in a water collider and changes Mega Dad’s response to gravity. We also tell Mega Dad to start breathing out air bubbles while within this collider in addition to spawning a “splash” sprite when he enters or exits the collider. It’s a nice example of interacting with maps exported with Tiled2Unity.

Tiled Object Layers Can Have Colliders Too
Keeping with the water scene example, there are no tiles with collision off the upper left and right side of that map and we’d like to keep Mega Dad from falling out of the world with invisible collision. That’s where we can use the Object Layer features of Tiled which are, like Tile Layers, exported into the prefab hierarchy as GameObjects.
In this case, Tiled2Unity does not attempt to combine geometry into one collider. Since we are placing Rectangles, Ellipses, Polygons, and Polylines in Tiled separately they are themselves exported as separate GameObjects.
- A Tiled rectangle object is exported as a
BoxCollider2D - An Tiled ellipse object is exported as a
CircleCollider2D(but only if it is a circle with equal width and height, Unity does not support ellipses) - A Tiled polygon object is exported as a
PolygonCollider2D - A Tiled polyline object is exported as an
EdgeCollider2D
To keep Mega Dad inside the level, I’ve added two rectangle objects to an Object Layer in the TMX file:

Like other collisions we can see what they look like in the Tiled2Unity previewer …

Once exported that gives us collision along the sides of our scene so that Mega Dad doesn’t fall out.

Ladders With Custom Importing
One of the hard-learned lessons from my Mega Man vs Cut Man experiment is what a horrible pain in the ass ladders are to implement. The in-game mechanics of ladders are left, sheepishly, as an exercise of the reader but at least getting ladder geometry into a game can be made easier with Tiled2Unity.
First, in Tiled, we make a separate Tiled Layer for all ladders in the scene and paint some ladders with tiles.

Note that the ladders Tiled Layer is given the Ladders value for the unity:layer property. This will add all ladder collision into a special physics layer for us to manipulate later through custom scripting later but for now we can paint ladders with tiles as we wish in our Tiled map file.
What We Need from Ladders
Because of the way our Mega Dad character interacts with ladders we need to know, for each ladder instance, the following information:
- The center-line (or spine) of each ladder
- The top of each ladder
- The bottom of each ladder
However, from Tiled2Unity, we get one PolygonCollider2D that represents all ladders in the Tiled Layer.

We could lay down polylines in Tiled that get exported into EdgeCollider2D instances but if we move, add, or remove ladder tiles from our map then we have to manipulate our polylines as well. Instead, we can take advantage of the custom importing feature of Tiled2Unity and write a script that will add the EdgeCollider2D instances for us.
Use ICustomTiledImporter for Custom Importing from Tiled2Unity
Tiled2Unity provides an interface that allows you to add custom behavior to the prefabs it creates from exported Tiled map files. You only need to write a script class that inherits from ICustomTiledImporter with the CustomTiledImporter attribute. Tiled2Unity will use reflection to find such custom importers and instantiate them as part of the import process. (If order of execution is important use the Order property of the CustomTiledImporter attribute.)
// Example custom importer:

[Tiled2Unity.CustomTiledImporter]
class MyCustomImporter : Tiled2Unity.ICustomTiledImporter
{
    public void HandleCustomProperties(GameObject gameObject,
        IDictionary<string, string> keyValuePairs)
    {
        Debug.Log("Handle custom properties from Tiled map");
    }

    public void CustomizePrefab(GameObject prefab)
    {
        Debug.Log("Customize prefab");
    }
}
For this example we’re going to use the CustomizePrefab method to crack open the PolygonCollider2D instances belonging to ladders and add the EdgeCollider2Ds we desire.
// From CustomTiledImporterForLadders.cs
public void CustomizePrefab(GameObject prefab)
{
    // Find all the polygon colliders in the pefab
    var polygon2Ds = prefab.GetComponentsInChildren<PolygonCollider2D>();
    if (polygon2Ds == null)
        return;

    // Find all *ladder* polygon colliders
    int ladderMask = LayerMask.NameToLayer("Ladders");
    var ladderPolygons = from polygon in polygon2Ds
                         where polygon.gameObject.layer == ladderMask
                         select polygon;

    // For each ladder path in a ladder polygon collider
    // add a top, spine, and bottom edge collider
    foreach (var poly in ladderPolygons)
    {
        GameObject ladderTops = new GameObject("LadderTop-EdgeColliders");
        GameObject ladderSpines = new GameObject("LadderSpine-EdgeColliders");
        GameObject ladderBottoms = new GameObject("LadderBottom-EdgeColliders");
        ladderTops.layer = LayerMask.NameToLayer("LadderTops");
        ladderSpines.layer = LayerMask.NameToLayer("LadderSpines");
        ladderBottoms.layer = LayerMask.NameToLayer("LadderBottoms");

        // Create edge colliders for the ladder tops
        // We assume that every polygon path represents a ladder
        for (int p = 0; p < poly.pathCount; ++p)
        {
            Vector2[] points = poly.GetPath(p);

            float xmin = points.Min(pt => pt.x);
            float xmax = points.Max(pt => pt.x);
            float ymax = points.Max(pt => pt.y);
            float ymin = points.Min(pt => pt.y);
            float xcen = xmin + (xmax - xmin) * 0.5f;

            // Add our edge collider points for the ladder top
            EdgeCollider2D topEdgeCollider2d =
                ladderTops.AddComponent<EdgeCollider2D>();
            topEdgeCollider2d.points = new Vector2[]
            {
                new Vector2(xmin, ymax),
                new Vector2(xmax, ymax),
            };

            // Add our edge collider points for the ladder spine
            EdgeCollider2D spineEdgeCollider2d =
                ladderSpines.AddComponent<EdgeCollider2D>();
            spineEdgeCollider2d.points = new Vector2[]
            {
                new Vector2(xcen, ymin),
                new Vector2(xcen, ymax),
            };

            // Add our edge collider points for the ladder bottom
            EdgeCollider2D bottomEdgeCollider2d =
                ladderBottoms.AddComponent<EdgeCollider2D>();
            bottomEdgeCollider2d.points = new Vector2[]
            {
                new Vector2(xmin, ymin),
                new Vector2(xmax, ymin),
            };
        }

        // Parent the ladder components to our ladder object
        ladderTops.transform.parent = poly.gameObject.transform;
        ladderSpines.transform.parent = poly.gameObject.transform;
        ladderBottoms.transform.parent = poly.gameObject.transform;
    }
}
At first glance this may seem like a lot of work, but, once written, this script will now import all ladders for us in all our maps. We can place ladders with ease in Tiled and let the custom importer do all the heavy lifting.
You can see the results of this in the ladders scene included in the tutorial Unity package.

Adding Spawners With Custom Import Scripting
With using the Tiled Map Editor as our 2D level editor we often need ways of marking up our worlds with some game-specific behaviors, with spawners for our game sprites being an obvious requirement.
Tiled allows us to place Tile Objects into an Object Layer. Moreover, our Tiles can have custom properties on them. Tiled2Unity allows us, through custom scripting, do get at these custom properties and manipulate the GameObjects they are attached to for game-specific behavior.
For this example we’re going to revisit a scene from the popular Mega Man 2 with the Appearing Block sprites from Heat Man’s stage.

Placing these Appearing Blocks in Tiled is easily achieved by using Tile Objects in an Object Layer. Here I’ve distributed a number of such Tile Objects amongst three Object Layers in the HeatManBlocks.tmx file.

The important part here is with the Tile representing our Appearing Block that we’ve added a custom property spawn with the value AppearingBlock. We only need to do this once and then we can place as many of those Tile Objects we wish. We’ll write some code soon that consumes those custom property values and, within Unity, will attach GameObjects to our map prefab.
Exporting this map into Unity we can see the blocks we’ve placed represented as GameObjects in the prefab …

… but right now they’re just empty, albeit with the right positional data imported from our Tiled map file.
In order to allow for game-specific importing of map data Tiled2Unity can hook into any custom properties we assign to our map, layer, or object data within our Tiled TMX files. This is achieved through the HandleCustomProperties function on the ICustomTiledImporter interface that we can inherit from in our Editor scripts. It passes in the dictionary of custom property name and value pairs as well as the GameObject that you’ve assigned such custom properties to.
Here’s an example of a custom importer script that looks for a custom AddComp property that we have set in Tiled and, during import, will add those components …

[Tiled2Unity.CustomTiledImporter]
class CustomImporterAddComponent : Tiled2Unity.ICustomTiledImporter
{
    public void HandleCustomProperties(UnityEngine.GameObject gameObject,
        IDictionary<string, string> props)
    {
        // Simply add a component to our GameObject
        if (props.ContainsKey("AddComp"))
        {
            gameObject.AddComponent(props["AddComp"]);
        }
    }

    public void CustomizePrefab(GameObject prefab)
    {
        // Do nothing
    }
}
Going back to our example with blocks, what we want to do is look for a spawn custom property with a value of AppearingBlock, instantiate the appropriate sprite, and then attach it to our game object.
[Tiled2Unity.CustomTiledImporter]
class CustomTiledImporterForBlocks : Tiled2Unity.ICustomTiledImporter
{
    public void HandleCustomProperties(UnityEngine.GameObject gameObject,
        IDictionary<string, string> props)
    {
        // Does this game object have a spawn property?
        if (!props.ContainsKey("spawn"))
            return;

        // Are we spawning an Appearing Block?
        if (props["spawn"] != "AppearingBlock")
            return;

        // Load the prefab assest and Instantiate it
        string prefabPath = "Assets/Prefabs/AppearingBlock.prefab";
        UnityEngine.Object spawn =
            AssetDatabase.LoadAssetAtPath(prefabPath, typeof(GameObject));
        if (spawn != null)
        {
            // Remove old tile object
            Transform oldTileObject = gameObject.transform.Find("TileObject");
            if (oldTileObject != null)
            {
                GameObject.DestroyImmediate(oldTileObject.gameObject);
            }

            // Replace with new spawn object
            GameObject spawnInstance =
                (GameObject)GameObject.Instantiate(spawn);
            spawnInstance.name = spawn.name;

            // Use the position of the game object we're attached to
            spawnInstance.transform.parent = gameObject.transform;
            spawnInstance.transform.localPosition = Vector3.zero;
        }
    }

    public void CustomizePrefab(UnityEngine.GameObject prefab)
    {
        // Do nothing
    }
}
Now when we reimport the map we see that our spawned block sprites were added to the prefab hierarchy …

With these spawned sprite objects now in the prefab they can be manipulated by other runtime scripts to add the gameplay we’re looking for – platforming blocks that appear and disappear with a given timed pattern (see the custom-import scene to play the example).

Complicated Gameplay with Little Work
These examples may seem a bit involved but I feel it’s a good example of how one could mix unity-specific and custom properties in Tiled with some scripting in your Unity project to achieve behavior that is specialized to the game you are creating. (It actually took me a lot longer to document the examples in this blog post than it did to build this Unity project.)
Any questions? Found a bug? As always feel free to drop me a line in the comments or email me. Happy developing.

Hi! My name is Sean Barton (aka Seanba).
I’m an American-Canadian software developer working in Austin, Texas where I never have to shovel snow. ![]()
My career focuses exclusively on video game software and tools. You can read more about me here.
Aseprite2Unity imports sprites and animations for use with your Unity projects. Like all my tools it is available for free or name your price.

SuperTiled2Unity is a collection of Unity scripts that import Tiled Map Editor files to your Unity projects. You can download for free or name your price.
(Note that regular Tiled2Unity is now deprecated.) ![]()
Like my tools? Consider making a donation as a way of thanks!